Los Angeles: 310-400-0195Orange County: 949-482-1357San Diego: 760-230-0798 info@3westenviro.com

Respirator Types

Types of Respirators

This is a video about the different types of respirators that workers might use in their workplace. If your employer requires you to wear a respirator on the job, the federal Occupational Safety and Health Administration – also called “OSHA” – and State OSHA Agencies require that your employer select an appropriate respirator for you.

A brief overview and general information about various types of respirators and some of your employer’s responsibilities under OSHA’s Respiratory Protection Standard will be discussed in this video.

This video can be part of the OSHA-required respiratory protection training, which includes many topics, like how to put on and take off a respirator and how to use, clean, and maintain your respirator. Your employer must also provide you with worksite-specific training.

There are two main types of respirators:

air-purifying respirators, which use filters, cartridges, or canisters to remove contaminants from the air you breathe,

and

atmosphere-supplying respirators, which provide you with clean air from an uncontaminated source.

Respirators can also be classified as tight-fitting or loose-fitting.

Tight-fitting respirators need a tight seal between the respirator and the face and/or neck of the respirator user in order to work properly. If the respirator’s seal leaks, contaminated air will be pulled into the facepiece and can be breathed in. Therefore, anything that interferes with the respirator seal is not permitted when using this type of respirator. This could include facial hair, earrings, head scarves, wigs, and facial piercings.

If you are required to use a tight-fitting respirator at work, you must be fit tested with the respirator selected for your use. Fit testing is done to be sure that the respirator’s facepiece fits your face. You must be fit tested before you use your respirator for the first time. You must also be re-tested at least every 12 months to be sure that your respirator continues to fit your face.

A fit test should not be confused with a user seal check. A user seal check is a quick check performed by the wearer each time the respirator is put on. It determines if the respirator is properly seated to the face or needs to be readjusted.

Loose-fitting respirators do not depend on a tight seal with the face to provide protection. Therefore, they do not need to be fit tested.

Your employer is responsible for selecting appropriate respirators to protect you from airborne hazards. To ensure that the correct respirator is selected, your employer must consider a number of factors.

First, your employer must identify and evaluate the hazard.

Your respirator will need different types of filters, cartridges, or canisters depending on the type and amount of airborne contaminant in your workplace. It is your employer’s responsibility to determine which filter, cartridge, or canister is necessary and how often it needs to be changed. For example, respirators that have particulate filters will not protect you against gases, vapors and the non-particulate components of fumes, mists, fogs, smoke and sprays.

Your employer must also determine if the work atmosphere lacks sufficient oxygen, that is, if it is oxygen-deficient, or is contaminated to the point of being immediately dangerous to life or health. This is also referred to as “IDLH.” Only atmosphere-supplying respirators, such as an airline respirator or a self-contained breathing apparatus – also known as an SCBA – can be used in IDLH atmospheres.

Once your employer has identified the type and amount of airborne contaminant present in your workplace, your employer will use this information to see how much protection you need the respirator to provide to you.

Different types of respirators offer different levels of protection. The measure of a respirator’s protection capability is called the Assigned Protection Factor or APF. This is a number that OSHA has assigned to each class of respirators. It represents the level of protection from airborne exposure each class of respirators is expected to provide. The larger the number, the greater the level of protection. For example, when used properly, a respirator with an APF of 10 will reduce your exposure to 1/10th the concentration of the contaminant in the air. Similarly, a respirator with an APF of 50 will reduce your exposure to 1/50th the concentration of the contaminant in the air. OSHA’s APFs can be found in Table 1 of its Respiratory Protection Standard.

When selecting an appropriate respirator, your employer must also consider whether the hazard has any additional characteristics that may affect the type of respirator selected. For example, does the hazard irritate the eyes? Do you need splash and spray protection as well as eye protection? If so, you will need a full facepiece respirator or some type of eye protection.

Let’s take a closer look at the different types of respirators that are available to protect you.

There are advantages and disadvantages to each type of respirator, so it’s important that your employer select the type that’s best suited for your work setting and the hazards you face.

These are filtering facepiece half-mask respirators, sometimes referred to as N95s. A filtering facepiece respirator covers the nose and mouth, and is a tight-fitting, air-purifying respirator in which the whole facepiece functions as the filter. Filtering facepieces may or may not have an exhalation valve to help exhaled breath exit the facepiece. They need to be fit tested, unless you are wearing them under voluntary use conditions. Filtering facepiece respirators filter out particles and do not protect against non-particulate hazards such as gases or vapors.

This is a half-facepiece elastomeric respirator. It is a tight-fitting, air-purifying respirator with replaceable filters (for particulates) or cartridges or canisters (for gases and vapors). In either case, these are attached to a rubber or silicone facepiece that covers the nose and mouth. This type of respirator needs to be fit tested and can be used instead of a filtering facepiece respirator.

An elastomeric half-facepiece respirator can be cleaned, decontaminated, and reused. This is not the case for a filtering facepiece respirator, which is normally discarded after use.

Like filtering facepieces, half-facepiece elastomeric respirators can be used for particulates, but they can also be used for many gases and vapors if equipped with the proper cartridges.

This is a full facepiece elastomeric respirator. This type of respirator provides a higher level of protection than a half-facepiece respirator because it has better sealing characteristics. Since it covers the user’s eyes and face, it can also be used to protect against liquid splashes and irritating vapors.

Like the half-mask elastomeric respirator, this respirator is a tight-fitting, air-purifying respirator with replaceable filters or cartridges attached to a rubber or silicone facepiece. It needs to be fit tested.

This is a loose-fitting facepiece powered air-purifying respirator, or PAPR. A PAPR has a blower that pulls air through attached filters. The blower then pushes the filtered air into the facepiece, which covers all of the user’s face. Since it is loose-fitting, it does not need to be fit tested and can be used by workers with facial hair.

Another type of PAPR is the tight-fitting full facepiece PAPR. This PAPR has an elastomeric facepiece made of rubber or silicone. It has filters and a blower that operate as they do on a loose-fitting facepiece PAPR. Because this PAPR has a tight-fitting facepiece, it must be fit tested.

There are also half-mask PAPRs as well as PAPRs that have a helmet or hood.

This is an airline respirator. It supplies clean breathing air to either a hood or a facepiece through a long hose, from a source of clean air such as a cylinder or compressor. If the facepiece is tight-fitting, it must be fit tested.

This is a self-contained breathing apparatus, or SCBA. It is a type of atmosphere-supplying respirator. SCBAs have a tight-fitting, elastomeric facepiece that covers the user’s face. The air is supplied from a cylinder of compressed breathing air that is designed to be carried by the respirator user. The facepiece is tight-fitting and must be fit tested. As its name implies, this respirator is truly self-contained. These respirators provide the highest level of respiratory protection.

You may hear someone refer to a respirator as an “N95” or a “P100.” While most people use the term “N95” to refer to filtering facepiece respirators, “N95” actually describes the type of filter material and its protective properties. The filter material can be used in either a filtering facepiece respirator or in a filter cartridge that’s attached to an elastomeric respirator.

The first part of the filter’s classification uses the letters N, R, or P to indicate the filter’s ability to function when exposed to oils.
“N” means Not resistant to oil;
“R” means somewhat Resistant to oil; and
“P” means strongly resistant to oil, or oil-Proof.

This rating is only important in work settings where oils may be present, because some oils can reduce the effectiveness of the filter.

The second part of the classification — the number– refers to the filter’s ability to remove the most-penetrating particle size during “worst case” testing.

Filters that remove at least 95 percent of these particles are given a 95 rating. Those that filter out at least 99 percent receive a 99 rating, and those that filter out at least 99.97 percent – essentially 100 percent – receive a 100 rating.

Using this classification method, an N95 filter is not resistant to oil and removes at least 95 percent of the most-penetrating particles.

If you use a PAPR, the high efficiency particulate air filter, or HEPA filter that is attached to your unit, is similar to a P100 filter.

The National Institute for Occupational Safety and Health, or NIOSH, tests different respirator models in its laboratory to make sure they meet certain minimum performance standards. To become “NIOSH-certified,” respirators must pass the performance tests listed in NIOSH’s regulations. For example, NIOSH tests the filter efficiency of the filter materials used in a respirator.

When respiratory protection is required, employers must provide NIOSH-certified respirators to their workers. To see if your respirator is NIOSH-certified, look for the NIOSH logo as well as the test and certification approval number, or TC number. The logo and TC number can be found on the respirator’s package or the user instruction insert, and sometimes they appear directly on respirator components, such as the respirator filter or cartridge. If your respirator is not NIOSH-certified, do not use it in a hazardous area.

You must never alter your respirator. Doing so can reduce its protective quality and expose you to the airborne hazard.

Never glue or staple things to your respirator; do not write on your respirator’s filter material; and never put holes in your respirator.

However, it is OK to write your name on your respirator’s straps.

You must never use unapproved parts on your respirator.

This video has provided you with a brief overview of the types of respirators available and how they are selected to protect you against airborne workplace hazards. There are many other things that you must know and do before you can safely use a respirator in a hazardous work environment. While this video may be part of your respiratory protection training, your employer must also provide you with additional training on respirators, including worksite-specific training.

Remember, if you don’t know if a respirator is needed for the task you will be doing, or if you are unsure about how to properly use a respirator or which filter or cartridge to use, talk to your supervisor before entering the hazardous area.

For more information about respirator use in your workplace, refer to these OSHA and NIOSH websites. You will find OSHA’s Respiratory Protection Standard, additional respirator training videos, and other guidance material to help you work safely.

Efflorescence

Efflorescence for Inspectors

Efflorescence on a CMU wall

Efflorescence on a CMU wall

Efflorescence is the white chalky powder that you might find on the surface of a concrete or brick wall. It can be a cosmetic issue, or it can be an indication of moisture intrusion that could lead to major structural and indoor air quality issues. A home inspector should understand what efflorescence is in order to recognize potential moisture problems.

Indications of Moisture

Efflorescence (which means “to flower out” in French) is the dissolved salts deposited on the surface of a porous material (such as concrete or brick) that are visible after the evaporation of the water in which it was transported. The moisture that creates efflorescence often comes from groundwater, but rainwater can also be the source. Efflorescence alone does not pose a major problem, but it can be an indication of moisture intrusion, which may compromise the structural material.

Porous Building Materials

Building materials, such as concrete, wood, brick and stone, are porous materials. Porous materials can absorb or wick water by a process called capillary action. As water moves through the porous material, salts can be drawn with it.

Concrete, wood, brick, stone and mortar are porous materials that contain salts. The ground in which these materials can come into contact also contain salts. Capillary action can literally suck water and transport it through porous building materials.

Capillary Action

Porous building materials are capable of wicking water for large distances due to capillary action with a theoretical limit of capillary rise of about 6 miles. That’s 6 miles directly up. Think of a tree and how a tree can transport water from its roots to its leaves. That’s capillary action. And it’s very powerful. When you add salt to that capillary process, it can be destructive.

Salts dissolved by groundwater can be transported by capillary action through porous soil. Building materials in contact with soil will naturally wick the water inward and upward. Take concrete footings — they are typically poured directly onto soil without any capillary break. Sometimes this is called rising damp. This is the beginning of how water can wick upward into a structure.

Destructive Pressures

When the capillary flow of water reaches the surface of a building material, evaporation occurs. As the water evaporates, salt is left behind. As this evaporation of capillary flow continues, the salt concentration increases, which creates an imbalance, and nature abhors imbalance and always wants to put things back into equilibrium. This is process is called osmosis. To re-establish equilibrium through osmosis, water rushes toward the salt deposit to dilute the concentration. This rush of water creates massive hydrostatic pressures within the porous material, and these pressures are destructive.

The pressure from osmosis can create incredibly strong hydrostatic pressure that can exceed the strength of building materials, including concrete.

Here are some examples of how that pressure translates:

  • diffusion vapor pressure: 0.3 to 0.5 psi
  • capillary pressure: 300 to 500 psi
  • osmotic pressure: 3,000 to 5,000 psi

As you can see from the list above, osmosis can create pressure that is greater than the structural strength of concrete, which can be from 2,000 psi to 3,000 psi. The action of water rushing to the surface due to capillary action creates incredible forces that can cause materials to crack, flake and break apart.

Spalling

When efflorescence leads to strong osmotic pressures—greater than the strength of the building material—and the material literally breaks apart, the resulting damage is called spalling. Hydrostatic pressure can cause spalling, but spalling can also be caused by freeze-thaw cycles in building materials that have a high moisture content.

Both efflorescence and spalling can be prevented with capillary breaks, such as by installing a polyethylene sheeting under a concrete slab.

Identifying Efflorescence

InterNACHI inspectors should already know how to distinguish between mold and efflorescence, but it is possible for homeowners to confuse the two. The expense of a mold test can be avoided if the substance in question can be identified as efflorescence.
Here are a few tips that inspectors can offer their clients so that they understand the differences:
  • Pinched between the fingers, efflorescence will turn into a powder, while mold will not.
  • Efflorescence forms on inorganic building materials, while mold forms on organic substances. However, it is possible for mold to consume dirt on brick or cement.
  • Efflorescence will dissolve in water, while mold will not.
  • Efflorescence is almost always white, yellow or brown, while mold can be any color imaginable. If the substance in question is purple, pink or black, it is not efflorescence.
  • If you dab a bit of the white chalk on your tongue and it’s salty, it’s probably efflorescence.
Aside from mold, the following conditions can result from excess moisture in a residence:
  • fungi that rot wood;
  • water damage to sheetrock; and
  • reduced effectiveness of insulation.
    White mold.
Inspectors should note the presence of efflorescence in their inspection reports because it generally occurs where there is excess moisture, a condition that also encourages the growth of mold.
Prevention and Removal of Efflorescence

Prevention

  • An impregnating hydrophobic sealant can be applied to a surface to prevent the intrusion of water. It will also prevent water from traveling to the surface from within. In cold climates, this sealant can cause material to break during freeze/thaw cycles.
  • During home construction, bricks left out overnight should be kept on pallets and be covered. Moisture from damp soil and rain can be absorbed into the brick.
  • Install capillary breaks, including polyethelene sheeting between the soil and the building material, such as concrete.

Removal

  • Pressurized water can sometimes be used to remove or dissolve efflorescence.
  • An acid, such as diluted muriatic acid, can be used to dissolve efflorescence. Water should be applied first so that the acid does not discolor the brick. Following application, baking soda can be used to neutralize the acid and prevent any additional damage to the masonry. Muriatic acid is toxic, and contact with skin or eyes should be avoided.
  • A strong brush can be used to simply scrub the efflorescence off.
NOTE:  The use of water to remove efflorescence may result in the re-absorption of crystals into the host material, and they may later reappear as more efflorescence. It is advisable that if water is used in the removal process that the masonry is dried off very quickly.
In summary, efflorescence is a cosmetic issue, but it indicates a potential moisture problem. Inspectors should know the how capillary forces can cause structural damage to building materials and educate their clients about efflorescence and the potential problems it may cause.
by Nick Gromicko, CMI® and Ben Gromicko
Contact us here for more information.

Moisture Meters

Moisture Meters

 
A moisture meter is a device designed to measure the moisture content of various building materials, such as roofing, siding, insulation, drywall, plaster, wood, tile and fiberglass. Structural and safety hazards, such as mold, rot and decay are all potential consequences of elevated moisture levels in these materials. An inspector can use a moisture meter to locate moisture that would not otherwise be apparent.
 
Here are a few ways that inspectors may find moisture meters useful:
  • A moisture meter can be used to determine whether a material is moist enough to allow mold to grow. Mold will begin to accumulate on surfaces that contain approximately 20% moisture, although this value varies based on vapor pressure and other factors.
  • An inspector can test the moisture level of a section of building material that appears to be dry, in order to establish a baseline from which other measurements can be compared.
Moisture meters can also be useful in the following applications that are not related to inspection:
  • If a home has been vacated due to flooding, a moisture meter can be used to determine if the home is once again suitable for occupancy.
  • Before a home is purchased, an inspector can use a moisture meter to determine if the house has leaks.  
  • A moisture meter can assist a homeowner in determining whether wood is dry enough to be painted or stained.
  • Wood installers use moisture meters to make sure that wood is dry enough to be installed.
Modes of Operation
 
Moisture meters come in two different varieties known as pin type and search mode. They are each suited to different applications, and InterNACHI believes that the best meters contain both options.
 
Pin Type
 
This mode is used to measure the moisture content of a material’s surface, or at an incremental depth using probes. While in this mode, the meter can measure the amount of moisture on a material by its electrical conductivity. This is often regarded as a more repeatable and accurate type of moisture measurement than the “search mode” described below, although intermittent wet spots in the wood may be missed by pin type meters. This method can be used to test for moisture on the surface of building materials, such as stucco, drywall, plaster or wood. It is especially useful for determining if the source of a stain on a wall or ceiling is active, or if it has been repaired.
 
Probes of varying lengths and designs may be used to extend the reach of a moisture meter operating in this mode. They are slender metallic poles with sensitive tips that extend the reach of the meter’s electrodes. Delmhorst makes probes that can be inserted deep into the straw in straw homes to measure its moisture content. Hammer probes can be driven into wood and then extracted. Other probes can be inserted into pre-drilled holes in masonry, or pushed through insulation. Moisture content in log homes can be measured by inserting a probe two-thirds of the way from the log’s surface to its center.
 
Search Mode
 
Search mode, also known as pinless mode, detects and measures moisture content beneath the surface of a material. Meters in this mode emit electromagnetic waves (usually radio waves or an electrical current) that are affected by the presence of moisture. The meter can detect changes in the characteristics of returned emissions and then use this information to calculate moisture content. Meters manufactured by Tramex, for instance, operate by the principle that a material’s impedance (resistance) to an electrical current varies inversely with that material’s moisture content. The instrument determines the amplitude of a low-frequency alternating current, and uses this information to calculate moisture content. Other meters, such as those manufactured by Protimeter and Wagner, detect the characteristics of emitted radio waves in order to determine the presence of excess moisture. These meters detect the amplitude of returning waves, which is diminished when they come in contact with water.
 
The actual depth that these waves travel varies based on the material’s properties and the device’s settings, but they generally penetrate from ½” to ¾” beneath the surface and are unaffected by surface moisture. Unlike the pin type, this mode of operation arrives at a relative value for moisture content that must be calibrated, using an external equivalency table in some models. The meter will display moisture content as a scale of color-coded lights that indicate whether the material is damp, dry, or in a borderline condition. In other models, such as those made by Wagner, the default setting can be used to approximate moisture content in most materials, although dense materials, such as cement, will require adjustment of the device’s controls. In addition, Wagner’s meters take a three-dimensional moisture average of the wood, which decreases the likelihood that intermittent wet spots will be missed. 
 
Search mode is commonly used in the following locations:
  • the sides and the base of a tub or shower. Any penetrations, such as faucets, showerheads and soap dishes, are likely locations of water leaks. The water can originate from internal plumbing behind the wall, or from the shower itself.
  • water that has escaped from a dishwasher into surrounding kitchen materials.
  • the sub-floor beneath a bathroom’s tile floor. Water intrusion can cause enough damage there that the toilet becomes detached.
  • peering behind a wall or floor covering, such as a vinyl floor or a tile wall.
False Readings
 
If metal is present within the penetrating range of the meter, it will alter wave characteristics in ways similar to water. The meter will report levels of moisture that are higher than the actual level of the material if it detects a copper wire, a metal pipe, or some other metallic substance. If an inspector suspects that the meter is sensing metal, s/he can monitor the readings as s/he moves the meter in a straight line away from the elevated reading area. The straight outline of a copper wire or metal pipe can usually be traced in this fashion.
 
In summary, moisture meters are capable of detecting moisture levels in most building materials. They are useful tools to have during home inspections because they can calculate the properties of inaccessible locations without causing them any damage. Two types of moisture meters are available, sometimes in the same model.
 
by Nick Gromicko, CMI® and Kenton Shepard

Mold, Moisture and Your Home

Mold Basics

  • The key to mold control is moisture control.
  • If mold is a problem in your home, you should clean up the mold promptly and fix the water problem.
  • It is important to dry water-damaged areas and items within 24 to 48 hours to prevent mold growth.

Why is mold growing in my home? 

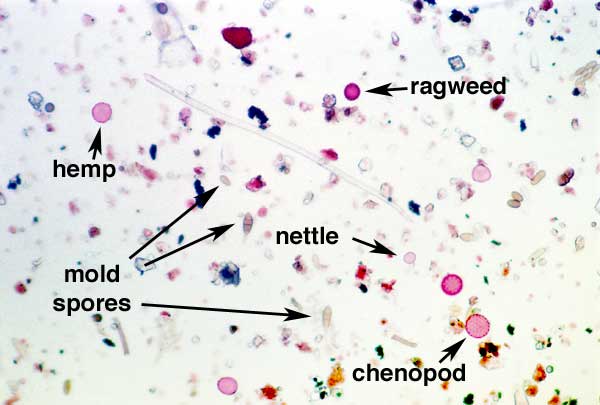
Molds are part of the natural environment.  Outdoors, molds play a part in nature by breaking down dead organic matter, such as fallen leaves and dead trees.  But indoors, mold growth should be avoided.  Molds reproduce by means of tiny spores; the spores are invisible to the naked eye and float through outdoor and indoor air.  Mold may begin growing indoors when mold spores land on surfaces that are wet.  There are many types of mold, and none of them will grow without water or moisture.

Can mold cause health problems?

Molds are usually not a problem indoors, unless mold spores land on a wet or damp spot and begin growing.  Molds have the potential to cause health problems.  Molds produce allergens (substances that can cause allergic reactions), irritants and, in some cases, potentially toxic substances (mycotoxins).  Inhaling or touching mold or mold spores may cause allergic reactions in sensitive individuals.  Allergic responses include hay fever-type symptoms, such as sneezing, runny nose, red eyes, and skin rash (dermatitis).  Allergic reactions to mold are common.  They can be immediate or delayed.  Molds can also cause asthma attacks in people with asthma who are allergic to mold.  In addition, mold exposure can irritate the eyes, skin, nose, throat and lungs of both mold-allergic and non-allergic people.  Symptoms other than the allergic and irritant types are not commonly reported as a result of inhaling mold.  Research on mold and health effects is ongoing.  This article provides a brief overview; it does not describe all potential health effects related to mold exposure.  For more detailed information, consult a health professional.  You may also wish to consult your state or local health department.

How do I get rid of mold?  

It is impossible to get rid of all mold and mold spores indoors.  Some mold spores will be found floating through the air and in house dust. Mold spores will not grow if moisture is not present.  Indoor mold growth can and should be prevented or controlled by controlling moisture indoors. If there is mold growth in your home, you must clean up the mold and fix the water problem. If you clean up the mold but don’t fix the water problem, then, most likely, the mold problem will recur. 

Who should do the cleanup?This depends on a number of factors.  One consideration is the size of the mold problem.  If the moldy area is less than about 10 square feet (less than roughly a 3-foot by 3-foot patch), in most cases, you can handle the job yourself, following the guidelines below.  

  • If there has been a lot of water damage, and/or mold growth covers more than 10 square feet, consult with an InterNACHI inspector.
  • If you choose to hire a contractor (or other professional service provider) to do the cleanup, make sure the contractor has experience cleaning up mold.  Check references and ask the contractor to follow the recommendations of the EPA, the guidelines of the American Conference of Governmental Industrial Hygenists (ACGIH), or other guidelines from professional or government organizations.
  • Do not run the HVAC system if you know or suspect that it is contaminated with mold.  This could spread mold throughout the building. 
  • If the water and/or mold damage was caused by sewage or other contaminated water, then call in a professional who has experience cleaning and fixing buildings damaged by contaminated water. 
  • If you have health concerns, consult a health professional before starting cleanup.

Tips and Techniques  The tips and techniques presented in this section will help you clean up your mold problem.  Professional cleaners or remediators may use methods not covered here.  Please note that mold may cause staining and cosmetic damage.  It may not be possible to clean an item so that its original appearance is restored.  

  • Fix plumbing leaks and other water problems as soon as possible. Dry all items completely.
  • Scrub mold off hard surfaces with detergent and water, and dry completely.
  • Absorbent or porous materials, such as ceiling tiles and carpet, may have to be thrown away if they become moldy. Mold can grow on or fill in the empty spaces and crevices of porous materials, so the mold may be difficult or impossible to remove completely.
  • Avoid exposing yourself or others to mold.
  • Do not paint or caulk moldy surfaces.
  • Clean up the mold and dry the surfaces before painting. Paint applied over moldy surfaces is likely to peel.  If you are unsure about how to clean an item, or if the item is expensive or of sentimental value, you may wish to consult a specialist. Specialists in furniture repair and restoration, painting and art restoration and conservation, carpet and rug cleaning, water damage, and fire or water restoration are commonly listed in phone books. Be sure to ask for and check references. Look for specialists who are affiliated with professional organizations. 
     

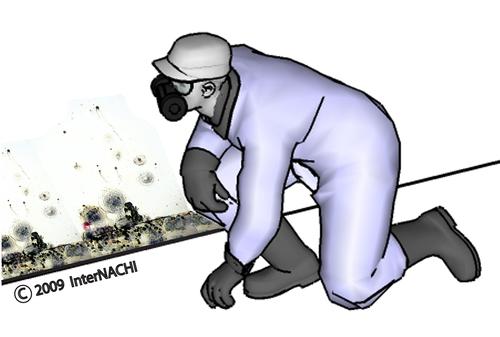
What to Wear When Cleaning Moldy Areas:

  • Avoid breathing in mold or mold spores.  In order to limit your exposure to airborne mold, you may want to wear an N-95 respirator, available at many hardware stores and from companies that advertise on the Internet. (They cost about $12 to $25.)  Some N-95 respirators resemble a paper dust mask with a nozzle on the front, and others are made primarily of plastic or rubber and have removable cartridges that trap and prevent most of the mold spores from entering.  In order to be effective, the respirator or mask must fit properly, so carefully follow the instructions supplied with the respirator. Please note that the Occupational Safety and Health Administration (OSHA) requires that respirators fit properly (via fit testing) when used in an occupational setting.
  • Wear gloves. Long gloves that extend to the middle of the forearm are recommended.  When working with water and a mild detergent, ordinary household rubber gloves may be used.  If you are using a disinfectant, a biocide such as chlorine bleach, or a strong cleaning solution, you should select gloves made from natural rubber, neoprene, nitrile, polyurethane or PVC.  Avoid touching mold or moldy items with your bare hands.   
  • Wear goggles.  Goggles that do not have ventilation holes are recommended.  Avoid getting mold or mold spores in your eyes.

How do I know when the remediation or cleanup is finished?

You must have completely fixed the water or moisture problem before the cleanup or remediation can be considered finished, based on the following guidelines:  

  • You should have completed the mold removal.  Visible mold and moldy odors should not be present.  Please note that mold may cause staining and cosmetic damage.   
  • You should have revisited the site(s) shortly after cleanup, and it should show no signs of water damage or mold growth.  
  • People should have been able to occupy or re-occupy the area without health complaints or physical symptoms.  
  • Ultimately, this is a judgment call; there is no easy answer. If you have concerns or questions, be sure to ask your InterNACHI inspector during your next scheduled inspection.

Moisture and Mold Prevention and Control Tips

  • Moisture control is the key to mold control, so when water leaks or spills occur indoors, ACT QUICKLY.  If wet or damp materials or areas are dried within 24 to 48 hours after a leak or spill happens, in most cases, mold will not grow.  
  • Clean and repair roof gutters regularly.  
  • Make sure the ground slopes away from the building’s foundation so that water does not enter or collect around the foundation.  
  • Keep air-conditioning drip pans clean and the drain lines unobstructed and flowing properly.
  • Keep indoor humidity low.  If possible, keep indoor humidity below 60% relative humidity (ideally, between 30% to 50%).  Relative humidity can be measured with a moisture or humidity meter, which is a small, inexpensive instrument (from $10 to $50) that is available at many hardware stores.  
  • If you see condensation or moisture collecting on windows, walls or pipes, ACT QUICKLY to dry the wet surface and reduce the moisture/water source.  Condensation can be a sign of high humidity.

Actions that will help to reduce humidity:

  • Vent appliances that produce moisture, such as clothes dryers, stoves, and kerosene heaters, to the outdoors, where possible.  (Combustion appliances, such as stoves and kerosene heaters, produce water vapor and will increase the humidity unless vented to the outside.)  
  • Use air conditioners and/or de-humidifiers when needed.  
  • Run the bathroom fan or open the window when showering.  Use exhaust fans or open windows whenever cooking, running the dishwasher or dishwashing, etc.

Actions that will help prevent condensation:

  • Reduce the humidity (see above).  
  • Increase ventilation and air movement by opening doors and/or windows, when practical.  Use fans as needed.  
  • Cover cold surfaces, such as cold water pipes, with insulation.  
  • Increase air temperature.


Testing or Sampling for Mold

Is sampling for mold needed?  In most cases, if visible mold growth is present, sampling is unnecessary.  Since no EPA or other federal limits have been set for mold or mold spores, sampling cannot be used to check a building’s compliance with federal mold standards.  Surface sampling may be useful to determine if an area has been adequately cleaned or remediated.  Sampling for mold should be conducted by professionals who have specific experience in designing  mold sampling protocols, sampling methods, and interpreting results.  Sample analysis should follow analytical methods recommended by the American Industrial Hygiene Association (AIHA), the American Conference of Governmental Industrial Hygienists (ACGIH), or other professional organizations. 

Suspicion of Hidden Mold  

You may suspect hidden mold if a building smells moldy but you cannot see the source, or if you know there has been water damage and residents are reporting health problems. Mold may be hidden in places such as the backside of dry wall, wallpaper or paneling, the top-side of ceiling tiles, or the underside of carpets and pads, etc. Other possible locations of hidden mold include areas inside walls around pipes (with leaking or condensing pipes), the surface of walls behind furniture (where condensation forms), inside ductwork, and in roof materials above ceiling tiles (due to roof leaks or insufficient insulation).

Investigating Hidden Mold Problems  

Investigating hidden mold problems may be difficult and will require caution when the investigation involves disturbing potential sites of mold growth. For example, removal of wallpaper can lead to a massive release of spores if there is mold growing on the underside of the paper. If you believe that you may have a hidden mold problem, consider hiring an experienced professional.

Cleanup and Biocides  

Biocides are substances that can destroy living organisms. The use of a chemical or biocide that kills organisms such as mold (chlorine bleach, for example) is not recommended as a routine practice during mold cleanup. There may be instances, however, when professional judgment may indicate its use (for example, when immune-compromised individuals are present). In most cases, it is not possible or desirable to sterilize an area; a background level of mold spores will remain, and these spores will not grow if the moisture problem has been resolved. If you choose to use disinfectants or biocides, always ventilate the area and exhaust the air to the outdoors. Never mix chlorine bleach with other cleaning solutions or detergents that contain ammonia because toxic fumes could be produced.  

Please note: 

Dead mold may still cause allergic reactions in some people, so it is not enough to simply kill the mold; it must also be removed. 

Ten Things You Should Know About Mold 

1. Potential health effects and symptoms associated with mold exposure include allergic reactions, asthma, and other respiratory complaints.
2. There is no practical way to eliminate all mold and mold spores in the indoor environment; the way to control indoor mold growth is to control moisture.
3. If mold is a problem in your home, you must clean up the mold and eliminate sources of moisture.
4. Fix the source of the water problem or leak to prevent mold growth.
5. Reduce indoor humidity (to 30% to 60%) to decrease mold growth by:
a. venting bathrooms, dryers, and other moisture-generating sources to the outside;
b. using air conditioners and de-humidifiers;
c. increasing ventilation; and
d. using exhaust fans whenever cooking, dishwashing, and cleaning.
6. Clean and dry any damp or wet building materials and furnishings within 24 to 48 hours to prevent mold growth.
7. Clean mold off hard surfaces with water and detergent, and dry completely. Absorbent materials that are moldy (such as carpeting and ceiling tiles) may need to be replaced.
8. Prevent condensation. Reduce the potential for condensation on cold surfaces (i.e., windows, piping, exterior walls, roof and floors) by adding insulation.
9. In areas where there is a perpetual moisture problem, do not install carpeting.
10. Molds can be found almost anywhere; they can grow on virtually any substance, provided moisture is present. There are molds that can grow on wood, paper, carpet, and foods.

Article by InterNACHI: https://www.nachi.org/mold.htm