3West Environmental, Inc. Earns 2020 Best of Porch Award Award reflects company’s consistently high level of customer service San Clemente, CA, February 17, 2021 – 3West Environmental, Inc. is proud to announce that it has earned the home service industry’s coveted...
Blog

3West Enviro Business Hours
Monday – Friday
8:00 AM – 5:00 PM PST
Closed Now
Need to reach us?
Send us a detailed message using the form below.
After Hours?
We will respond to after hours requests the next business day.
Request Service
Please fill out the form below to request an estimate or schedule service.
Asbestos: Facts and Tips for Home Inspectors and Homeowners
What Is Asbestos? Asbestos is a mineral fiber that can be positively identified only with a special type of microscope. There are several types of asbestos fibers. In the past, asbestos was added to a variety of products to strengthen them and to provide heat...
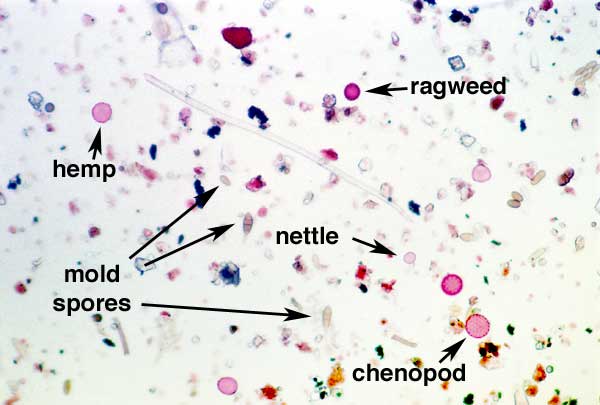
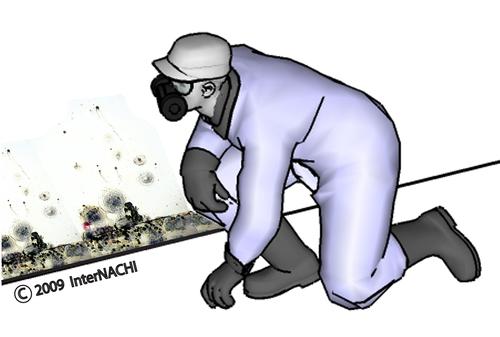
Air Sampling for Mold Inspections
Taking air samples during a mold inspection is important for several reasons. Mold spores are not visible to the naked eye, and the types of mold present can often be determinair sampleed through laboratory analysis of the air samples. Having samples analyzed can also help provide evidence of the scope and severity of a mold problem, as well as aid in assessing human exposure to mold spores. After remediation, new samples are typically taken to help ensure that all mold has been successfully removed.

Advantages of Solar Energy
Solar energy offers considerable advantages over conventional energy systems by nullifying flaws in those systems long considered to be unchangeable. Solar power for home energy production has its flaws, too, which are outlined in another article, but they’re dwarfed by the advantages listed below.
Abrasive Blasting for Mold Remediation
Abrasive blasting is a process for cleaning or finishing objects by using an air-blast or centrifugal wheel that throws abrasive particles against the surface of the work pieces. Sand, dry ice and corncobs are just some of the different types of media used in blasting. For the purposes of mold remediation, sodium bicarbonate (baking soda) and dry ice are the media commonly used.

10 Easy Ways to Save Money & Energy in Your Home
Most people don’t know how easy it is to make their homes run on less energy, and here at InterNACHI, we want to change that.
Drastic reductions in heating, cooling and electricity costs can be accomplished through very simple changes, most of which homeowners can do themselves. Of course, for homeowners who want to take advantage of the most up-to-date knowledge and systems in home energy efficiency, InterNACHI energy auditors can perform in-depth testing to find the best energy solutions for your particular home.
Building An Abatement Enclosure
https://youtu.be/wjGUrXOLvMY Building an Abatement Enclosure for Asbestos, Lead, Mold or Dust Control
Respirator Types
https://youtu.be/u_Dovk_khLw Types of Respirators This is a video about the different types of respirators that workers might use in their workplace. If your employer requires you to wear a respirator on the job, the federal Occupational Safety and Health...
Lead Paint Testing Requirements
Is lead paint testing a requirement in California? Yes. Any structure originally built before January 1, 1978 needs to be tested for lead-based paint. Here is some information on lead testing requirements in California. This information does not address local building...
Efflorescence
Efflorescence for Inspectors Efflorescence is the white chalky powder that you might find on the surface of a concrete or brick wall. It can be a cosmetic issue, or it can be an indication of moisture intrusion that could lead to major structural and indoor air...
Related Posts
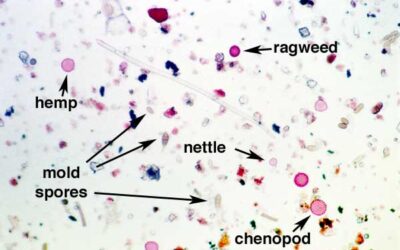
Air Sampling for Mold Inspections
Air Sampling for Mold Inspections by Nick Gromicko, CMI® and Ethan Ward During a mold inspection, taking air samples is crucial for several reasons. Mold spores aren't visible to the naked eye, and laboratory analysis of air samples can identify the types of mold...

Asbestos Cement Siding Inspection
Asbestos Cement Siding Inspection by Nick Gromicko, CMI® Asbestos cement is a composite material made from Portland cement reinforced with asbestos fibers. Manufacturers popularized asbestos cement siding before banning it in the U.S. in the 1970s. During inspections,...

SCAQMD Rule 1403 Procedure 5 Cleanup Plan
Understanding SCAQMD Rule 1403 Procedure 5 Cleanup Plan The South Coast Air Quality Management District (SCAQMD) has established Rule 1403 to regulate asbestos emissions from demolition and renovation activities. Among the procedures detailed in this rule is Procedure...